ESPHome
ESPHome is an easy way to program ESP8266 and ESP32 microcontrollers using YAML. In practice, you write a YAML configuration file that is then compiled into C++ and then machine code and is flashed onto to specific micro controller.
Installation
Simplest Method
If you installed Home Assistant OS or Home Assistant Supervised, then you can add ESPHome from the addon store.
Docker Method
I prefer the Docker Method, because I enjoy understanding and having control of all the pieces in my system. You can absolutely run ESPHome using Docker commands. You will need to also have a volume to store the configuration files.
# Create Docker Volume
docker volume create config_esphome
# Create Docker Container
docker run -d \
    --network host \
    -l com.centurylinklabs.watchtower.enable=true \
    -v config_esphome:/config \
    --name ESPHome \
    esphome/esphome:latest
Update Container
With the docker method, you will need to manually maintain the updates for your container unless you are using a container like Watchtower to automtaically update containers.
# Stop Current Container
docker stop ESPHome
# Remove Current Container
docker rm ESPHome
# Create new Container using New Image
docker run -d \
    --network host \
    -l com.centurylinklabs.watchtower.enable=true  \
    -v ESPHome:/config \
    --name ESPHome \
    esphome/esphome:latest
Secrets
Configuration in ESPHome is in YAML. While this is great, sharing YAML configuration becomes a hassle because you need to remove all the passwords or other secret items from your configuration before sharing.
Secrets make it so that you can replace passwords or other Secrets using !secret <secret_name>. Example:
# Before
wifi:
  ssid: MyHomeNetwork
  password: VerySafePassword

# After
wifi:
  ssid: !secret wifi_ssid
  password: !secret wifi_password
Setup / Edit Secrets
- Open your ESPHome dashboard
- For self hosted, the default port number is 6052
- In the top right corner, click on
Secrets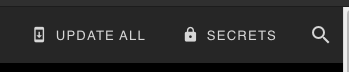
- Create your secret using the following format
<secret_name>: "<value>"
- In the top right corner, click
Save